

 ホーム
ホーム ブログ
ブログ アクセス
アクセス3Dプリントアトリエ
春が来ました!まもなく車庫を作りたいと思いますので、材料の種類と価格を調べながら計画を書きました。
Spring has properly arrived in Aso, and that means that rainy season and then typhoon season are not too far behind! So, to avoid any falling-tree incidents like last year, I'm going to start construction on a small one-car garage for my lovely old baby.
▲ 相変わらず無料デザインソフト「Sketchup」で図面を描きました。現在、車一台の狭いスペースがこっちにありますが、そこに車庫を木材でDIY作成します!
I'm planning to do this whole project on my own, using low-cost DIY techniques wherever possible. The first of these is to carefully draw up plans myself for each stage of the build, while simultaneously researching the best materials and costs for the job!
I started, as always, with my old friend Sketchup. This is free 3D design software that you can download from the net, and allows me to quickly size things out and try different styles. I'm planning to build this garage at the front of the house, over the small bricked parking space that currently exists there. I'm going to need to expand the area by about 80cm to the side and rear to make it big enough to park comfortably and get out of the car.
▲ まずは、砂利とコンクリートで土台を作ります。生コンクリートはミクサー者の配達でいただけたら嬉しいですが、どうでしょうね?その中にある黒い線は網メッシュの位置ですね。網メッシュがコンクリートの中に埋め込みます。
The first step is to create a concrete foundation base for the garage, which will probably weigh a little over 1ton when it's finished. I'm planning on digging out the ground, and filling it with compacted gravel before pouring over about 10cm of concrete. It doesn't sound like much, but even that will weigh well over 3 tons just for the concrete! The black lines in the middle are the wire mesh panels which will be embedded in the concrete to give it extra strength.

▲ 土台の上にブロックの壁を作ります。
The garage will need a low wall on 3 sides, to prevent water from reaching the wooden building structure, and I've decided to do this with a single layer of concrete blocks. I've done block laying a couple of times in the past, for flowerbeds and so on, but this time it will need to be perfectly level! No pressure, then....

▲ ブロック壁の上に木材フレームを作ります。最近木材の価格で大変高くなりましたので、ちょっと悲しいですが仕方がないですね。できるだけ安い方法「ツバイフォー」のパイン材でフレームを作ります。
The wooden frame wall will be lifted onto the base in sections, and bolted together. Since wood is currently very expensive (double that of pre-covid prices!), I'll be using the cheapest method of constructing the walls with 2x4s. Actually, I plan to use 2x6s (which are wider at 140mm) for the corners, tops and bottoms, and then the thinner and cheaper 2x4s (89mm wide) for the rest of the frame.

▲ 屋根もやすいツバイフォーの木材で作ります。家の屋根が大体45度でピッチしていますが、メンテナンスのために車庫の屋根を30度ピッチで計画しました。
The roof trusses will also be constructed with 2x4 beams, and then attached to the walls. I've decided to do a 30-degree angle pitch to the roof, because the 45-degree angle of the main house makes maintenance really, really hard! And since it's sheltered by my lovely pine trees, heavy snowfall shouldn't be a big issue.

▲ フレームの周りにOSBボードを張ります。内面がインテリアの壁になりますので、白にペイントをするつもりです。
The walls will then be covered in chipboard panels, and I'm planning on painting the insides of those white, since they'll be making up the interior walls of the building.

▲ 屋根のトラスを結ぶためにまたOSBボードを使います。その上に防水シートと屋根材を使います。
The roof will also be covered in the same chipboard panels, on top of which I will tack waterproof sheeting and then a top layer of roofing tile panels.

▲ 何年も使いたいのでサイディングを張ります。これは家と同じスタイルをマッチできますが、色合いが家の赤ではなく多分黒にペイントします。
I'm planning on using similar siding panels for the exterior of the garage, so that it matches the style of the house. Those panels are very heavy and a little pricey, but they should last for many, many years. I'm probably going to paint the garage black, because I think it'll look pretty good with the red house next to it.

▲ 最後に車庫の正面に大きい両開きドアをDIYで作りたいです。ドアに窓を付けたら、側面の大きい窓3枚から光が入れます。これで道からでも、家からでも愛車の形が見えます!それが大事ですね!
The last job will be to fit 2 large hinged doors to the front. I've decided to stay away from shutters and electric openers, because repair fees are stupidly high. So instead I plan to build a couple of DIY doors and add large glass windows in them. Those windows, combined with the large 3 panel windows at the side, should provide plenty of natural light and also give me a view of my lovely car from the front, the side, AND from inside the house.
Honestly, I think admiring a beautiful car is one of the greatest pleasures in life, so those windows are super important to me!
So my estimated costs are as follows:
That's a total of 650,000yen, which is by no means cheap, but the whole deck was about the same price, and has made a HUGE difference to the house. Hopefully this will too. Anyway, this will be my last project for this house, so I guess it's fair that it's a big one?!
阿蘇で春がやっと着ました!デッキの周りに花壇・ハーブ園・小さい野菜畑を作りたいです。
Spring has finally come to Aso, so it's time to get out and do some gardening! This year I'm finishing off the deck area with a surrounding ring of decorative beds.

▲ 最初に、近くのDIY店で26個プランターを買って、デッキの横に並べました。
I started by going out and grabbing 26 cheap plastic planter tubs, which will allow me to remove weeds and rotate plants more easily.

▲ デッキと同じ人工木材でプランターの前に壁を作りました。これで地面の凸凹が隠せるはずですね。
But planters on their own are not particularly attractive, so I decided to conceal them inside a low wall of the same artificial wood planks that the deck is made from. After digging out a few bumps and rocks, I managed to get a fairly even line of bed walls, so I hammered in a few posts and bolted them in place. It does a pretty good job of hiding the uneven slopes and bumps of the grass areas... and the wonky deck!

▲ 側面に一枚だけを使いましたが、正面に2枚をかすねました。地面とデッキの高さが結構遠いですから。
The gap between the deck and grass was pretty big at the front, so I used a double layer of planks there to make it taller.
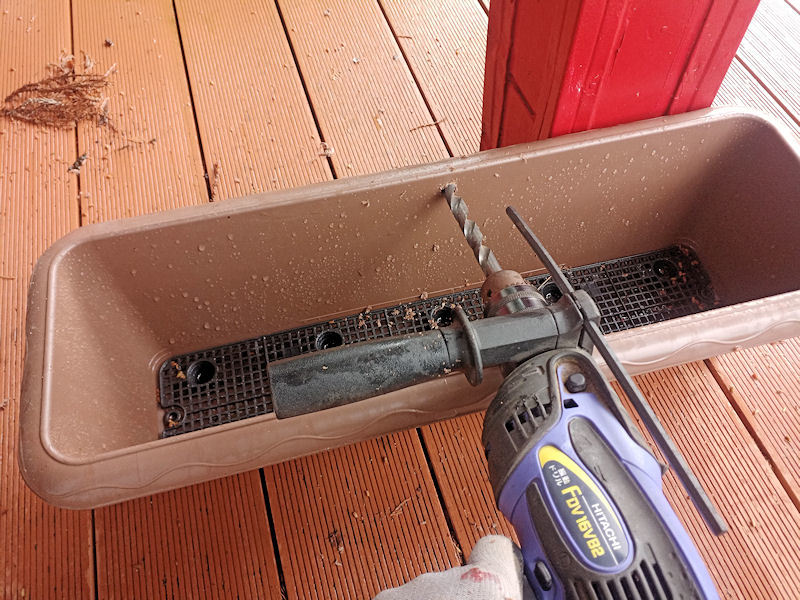
▲ プランターの後ろに灌漑システムを作りたかったので、アマゾンから安いやつを買いました。一個ずつの水供給を設定したいので裏面に穴をあけました。
One thing I wanted to try for this project was a simple irrigation and watering system, so that if I need it in the future I can plug in an automatic timer to water crops daily in summer. So I bought a cheap 30-metre irrigation kit from Amazon Japan, and drilled a hole in the back wall of each planter.
▲ 灌漑システムに入っていたノズルとパイプを後ろから差し込みました。
The pipes are concealed behind the planters, and a junction point for each one allows a small nozzle to be poked through the holes.

▲ キットの赤いノズルはちょっと目立つでしたので、プランターと同じ色でスプレーしました。
The nozzles that came with the kit had bright red nozzles, so I decided to dull things down by changing their colour. Happily, I had a spare spray can of matt brown, that was a perfect match for the colour of the planters.

▲ 結局こんな感じになりました。蛇口で水を流したら、一発で26個のプランターまで来ます。ラクラク!
So here's the result! By turning on the water supply at the garden tap, I get a little spray of water to each of the planters. Easy-peasy!

▲ 最後に近くのDIY店から花壇用土を260L買いました。また私のカワイイ「軽トラック」で家に持って帰れました。
The last thing to do was to pop off to the local DIY store and pick up 26 bags of soil, and as always my little 'pickup truck' performed wonderfully :)

▲ 完成です!どうですか?正面に明るい花が飾っています。
All finished! At the front I'm hoping to grow a nice bright selection of colourful flowers.

▲ 側面にハーブ園、そして野菜も植えています。成功したらちょっとびっくりになりますが、どうですかね?
Along the long side there are various herbs (rosemary and chives, etc, which are very handy for cooking), and then also some planters of vegetables. I even found rhubarb seeds, so I'm looking forward to some rhubarb crumble in the summer, perhaps?..... although I'll be very surprised if I get even a single edible bit of veg, to be honest!

▲ これで家が完成です。後は車庫だけですかね。。。
Yay, the house is finished! Cute, isn't it? One last project for this year is a garage, but that's a job for later...
明けましておめでとうございます! Happy new year, everybody!
今年のプロジェクトは4つです:
There are a few projects planned for this year:
。。。ですが、去年に1階の展示スペースがやっと完成できました。
...but first I'll just show off some pics of the completed downstairs studio room!
▲ 棚を役に立つスペースにしたかったので、まずは3Dプリンター2台を置きました。そして、真ん中に店レジ用のiPad(と音楽スピーカーなど)とキャッシュボックスを埋め込みました。
I wanted to turn these wood shelves into something a little more useful, so I started off by adding an enclosure with two 3D printers and some LED strips to light them. I ordered an acrylic sheet to cover the front of the printer space, to keep out dust and doghair!
Then in the middle space I added an old iPad that would serve as a shop register (in addition to playing music), and a cash box.

▲ キャッシュボックスはアメリカ製の鉄砲用の「ガンセーフ」ですが、指紋ロックが付いていますので結構便利と思っていました。中には1千・5千・1万円札のトレイを入れたかったですので、3Dプリントで作りました。いいでしょう?
The cashbox is actually a small gun-safe made in the US, but it has biometric fingerprint access - which means it will pop open quickly, to act as the other half of the shop register. I designed and printed these simple money clips to fit inside the lid, to hold notes, and small coin trays for the change.

▲ 展示用の棚にしたいので近くの工務店にグラス切を頼みました。スライド式の2枚グラスに3Dプリントされたハンドルも作成しました。
I also carefuly measured the shelf fronts, and had sheets of glass cut to size at a local handyman store. Two sheets of glass for each space, and they slide along simple plastic rails. The plastic handles for each glass front were, of course, 3D printed!

▲ アトリエで作成された情景モデルやペイントしたプラモデルが現在展示されています。
So at the moment there are loads of 3D printed terrain models, plus of course tons of painted fantasy and sci-fi models - my hobby for the past 30 years! Now they finally get proper places to be displayed in the sunshine!

▲ 日本の情景モデルが結構集まっていますので、もういっぱいかも!
I've designed and painted so many samurai-themed building models over the last 3 years or so, that the middle shelves are already full of them!

▲ 一番上に夏に作った「国造神社」も置いてあります。
You can see the large shrine building didn't quite fit inside the shelves, so it had to go up on top!
先週はハロウィーンでしたので、3Dプリントしたコスチュームをやっと着れました。今回北九州でしましたが、次回から阿蘇のほうでしようと考えています。
Last week was Halloween, so I finally got to try on my new costume. This year was my final halloween night out in Kitakyushu, so from next year I think I'll try Kumamoto or Aso!
▲ コスチュームのイメージはこんな感じでした。
This was the costume I was aiming for - Johnny Depp from the old Edward Scissorhands movie. He actually has a head-to-toe leather bodysuit, covered in buckles and straps, but using this old shirt and grey trousers to cover up most of it makes it much, much easier to duplicate as a costume.

▲ 「80sロッカー」のかつらを買ったんだけど、切る前に念のために写真も撮りました!コワイ!
I found a messy wig on Amazon, entitled "80s Rocker", which I thought would make a good basis for Edward's hair. I couldn't help take this incredibly dumb pic before I started cutting, and had a shave for the makeup.

▲ 切った後に木材ボンドと水を混ぜて、指で形を作りました!
After trimming off much of the length and bulk of the wig, I mixed wood glue and water, and worked it into the wig with my fingers. I could have tried hairspray or mousse, but I thought that the glue would be much harder and stay in shape better, once it was dry.

▲ この前プリントしたScissorhandsのグローブをやっと使えました。
These were the gloves I printed last month, and painted up with lots of silver scratches and edges.

▲ 首のやつがダイソのベルトで作りました。メイクも100円ショップで買いました。
The neck piece was made from a few 100-yen shop belts, and velcroed at the back. Then I cut one suspender belt, as per the movie, and pinned it together again. The makeup was also 100-yen shop pale foundation, with a deep purple for the lips and some eye shadow around the eyes. Not perfect, but luckily it would be dark later on, so hopfully it would do fine.

▲ 手なしの夜は大変だったけど、全部で大成功でした!来年、阿蘇市のほうでハロウィーンもしようね!
And here's the final costume! Edward Scissorhands! Those hands were tricky to move around in, but it looked great! Watch out for me haunting Aso next year as Edward....
今日からオンライン通信販売サイトのグランドオープンセール始まります!「GRANDOPEN」の割引コードをレジページに入れるとなんと20%OFFになります!
現在、日本歴史アイテム91個も載せています。そして、7つの縮尺でご注文できます。
We're starting our grand opening sale from today, with an awesome 20% OFF discount available on everything at the moment - just enter the discount code "GRANDOPEN" at the shopping cart register page!
Currently we've got a whopping 91 items available in the store, at 7 different model scales.


ぜひどうぞ、ご注文をお待ちしております!
We're looking forward to printing your orders soon!
〒869-2226 熊本県阿蘇市乙姫2070-48
営業時間:13:00~17:00*
営業日:毎週金曜日・土曜日
(* ドアが閉まっている場合もあります ー 近くにいます。ちょっとお待ち下さい!)


")
Painted models available 塗装済の模型発売中!
Making garage doors ガレージの扉DIY作成
New side-project... a hobbit house! ホビットの家
Shops added to the shop ショップにお店
Repainting a (mini) car ミニカーのリペイント
Buying land in Otohime 乙姫で土地探し
Scale model of the Inaba Residence 稲葉家下屋敷の模型


 神社
神社 寺
寺 茶屋
茶屋 城
城 店
店 家
家 農場
農場 建物その他
建物その他 壁・柵
壁・柵 橋
橋 池
池 LEDライト
0 コメント :
コメントを書く :