| << Floating shelves 棚作り 2022-01-11 | E-bike conversion DIYで電動自転車を作った! >> 2022-03-08 |
2階リビングの最後の大きい作業になりますが、やっと床暖房を付けようと決めました。エアコン暖房が目にかゆいので、部屋の反対側がまだ寒いので、今回床暖房にします。エアコン暖房と比べたら、電気の床暖房が安いですね。今回2万円ほどの予算です ー 安いでしょう?
ただし、その上に新しい無垢フローリングも付けますので、それだけがちょっと高いですね。どうしてもフローリング買え変えを考えている方にはお勧めです。そしてランニングコストもエアコン暖房より安いです。大きいエアコン暖房は大体5kWですが、今回の床暖房が約3kWで、熱が下から来ますので気持ちいいですよ。
Today's blog is a slightly long how-to guide, detailing how you can make your own DIY underfloor heating system for a low cost, and with great results.
The upstairs living room (and kitchen and office!) is currently heated by a wall airconditioner, which produces enough heat to slowly warm the room, but it also dries out my eyes and only works best on one side of the room. The office on the other side of the room stays pretty chilly. So I've decided to make my own DIY heating system using electric underfloor heating film, for about $200. That's pretty cheap, and it's also cheaper to run, because it uses approximately 3kW of power as compared to the 5kW of the airconditioner. What's more, it will be in the centre of the room, and the heat starts at floor level, so you can lie down on it. All in all, it's just a better and more efficient heating system.
Having said that, you need to place it under the floor, which can be a pain. I'll be covering mine with new flooring for the whole room, which is the expensive part... but if you're renovating a room anyway with new flooring, adding an underfloor heating system is a total no-brainer!
▲ ショッピングリスト:
Here's what you'll need....
110V heating film (top left of the photo). I found that it was much cheaper to buy in bulk directly from the manufacturer, so bought this 100m roll (50cm width) directly from felixkorea.com, which cost $200 plus $160 to ship from Korea. For this large living room I will only be using 30m or so, so I can use the remaining 70m of the roll for other rooms.
Electronic thermostat controller (bottom right). These are as cheap as $15 on Ebay, and work with 100v to 240V systems.
Film crimp clips (centre left). Pack of 40 for $8 on Ebay.
2-core cable (bottom left). 5m for about $20 on Amazon Japan. It connects the fusebox to the controller.
Cable connectors (centre). Box of connectors for $10 on Amazon Japan.
Red/black electrical cord. 6m of 2mm thickness was $7 on Amazon Japan, and I used about 10m for this room.
Waterproof butyl tape (single sided). 50mm width tape is $8 on Amazon Japan for 20m.
How to video:
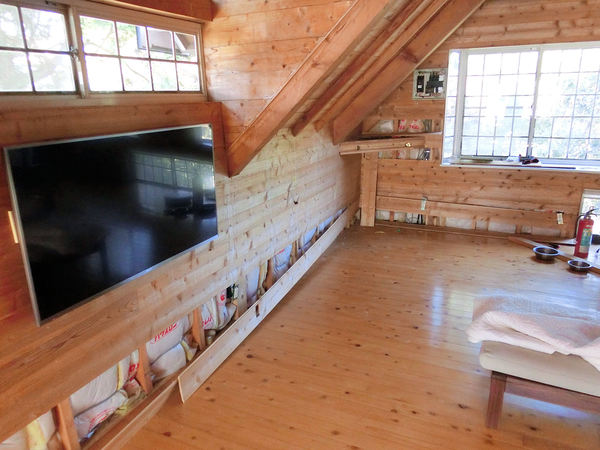
▲ まずは電気配線の準備です。ブレーカーボックスから壁に埋め込むコントローラーまで2コア電気ケーブルを使えました。壁の中に通さないといけないので、この作業がちょっと大変でした!壁を開かないといけないんです。使っていないブレーカーにつなぎます。
コントローラー用の穴を壁に開けました。やり方がコンセント用の穴と同じです。
I started this job by opening up the walls, and running some 2-core cable from the fusebox to a convenient point on the wall above the heating area. Then I cut a small hole in the wall there, into which the thermostat controller would fit.
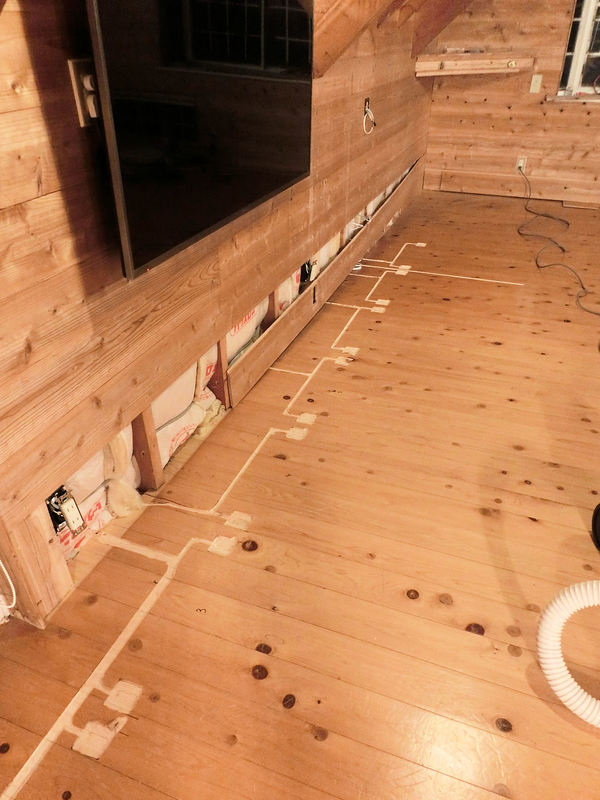
▲ 次は各50cm幅のヒーティングフィルムをコントローラーにつなぎました。シリーズ接続ではなくパラレル接続が必要です。配線が3mmほどの厚みとなりますので、電気ルーターで配線の位置を削りました。
Next came the super messy bit... I used an electric router to carve channels in the (old) floor, into which the cables would fit. Each 50cm-wide section of heating film requires its own cable connection, and these have to be joined on a basic parallel circuit (i.e. not in series!).
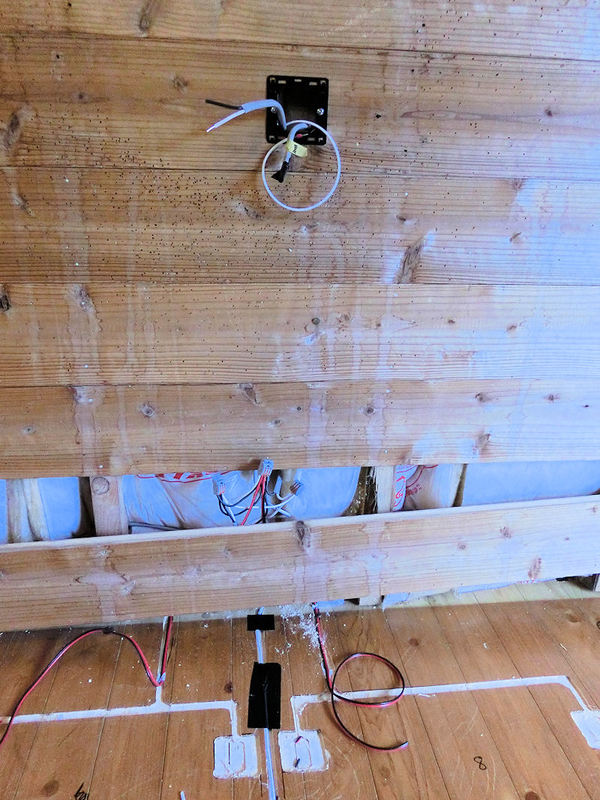
▲ この写真にはコントローラーの穴が見えます。右からくるケーブルがブレーカーにつなぎます。2本目のケーブルが下のコネクターにつなげて、各フィルム用の8本の赤/黒配線に分けました。
その白い配線(黒いテープが張っているところ)が気温センサー。コントローラー機のオプションパーツです。フィルムと同じようにフローリングの下に置きます。
Basically, you can see that each section of heating film has its own red & black cable, which are joined inside the wall using cable connectors. I had 8 strips of film, so two groups of 4 red wires each go into their own connector, and then those 2 connector wires finally meet up in another connector, which plugs into the back of the controller. The same is done for the black wires.
See this very detailed PDF guide on how to install underfloor heating.
One other thing I did was to run a thin temperature sensor wire (comes with the controller) in between 2 film sections, to monitor floor temperature. That's the white wire in the photo above, covered by black tape.
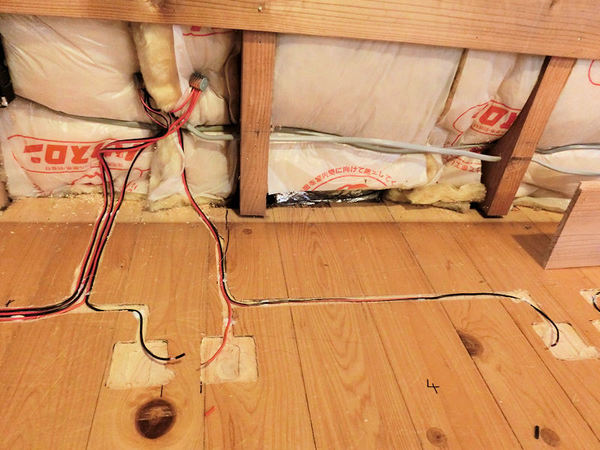
▲ 各フィルムには赤/黒の配線が必要です。ずれないようにホットボンドで固定しています。
I fixed each red and black wire inside its carved channel using a hot glue gun.
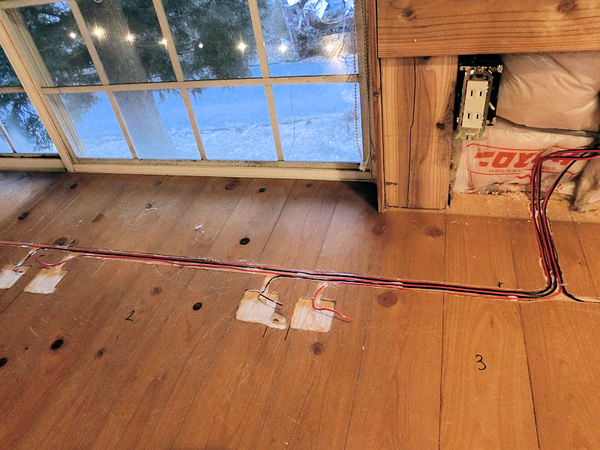
▲ この写真も同じです。2枚目と3枚目のフィルムのところに配線がつながっています。
It was a bit time-consuming, running wires to each of the 8 sections and cutting to length, but not hard.
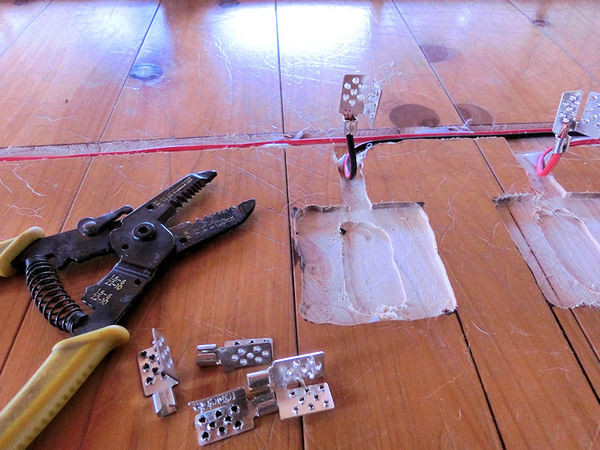
▲ 各配線にはフィルム用のクリップを写真のように付けないといけません。
Next thing to do is to add crimp connectors to the end of each wire, as shown in the photo above. I also added a little bit of metal solder, to make sure the connection was secure.
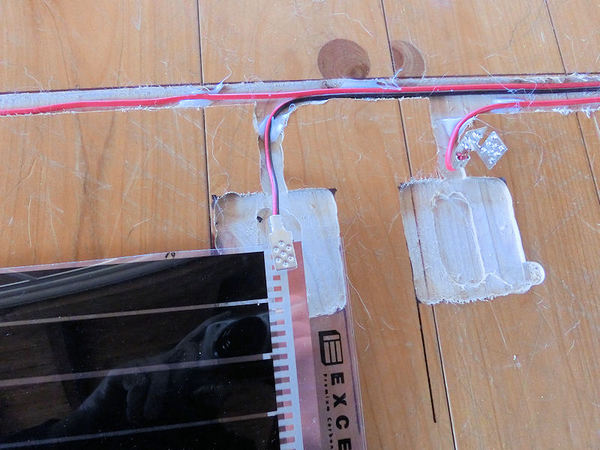
▲ フィルムを入れると銅のところにクリップを固く閉めます。
Then I used some strong pliers to squeeze each crimp closed around the heating film. As long as it connects properly through the copper strip, then your circuit is complete. You should test connections at this point.
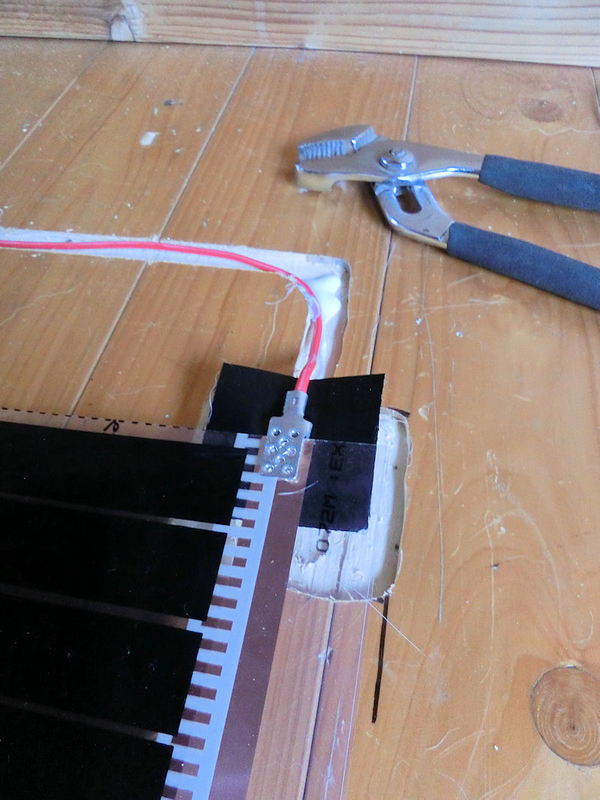
▲ 最後にクリップの周りに防水テープを張ります。クリップの下に5cm²テープを付けて。。。
Finally, you should cover each crimp connector with a square of waterproof tape, to ensure it remains unaffected by spills and moisture.
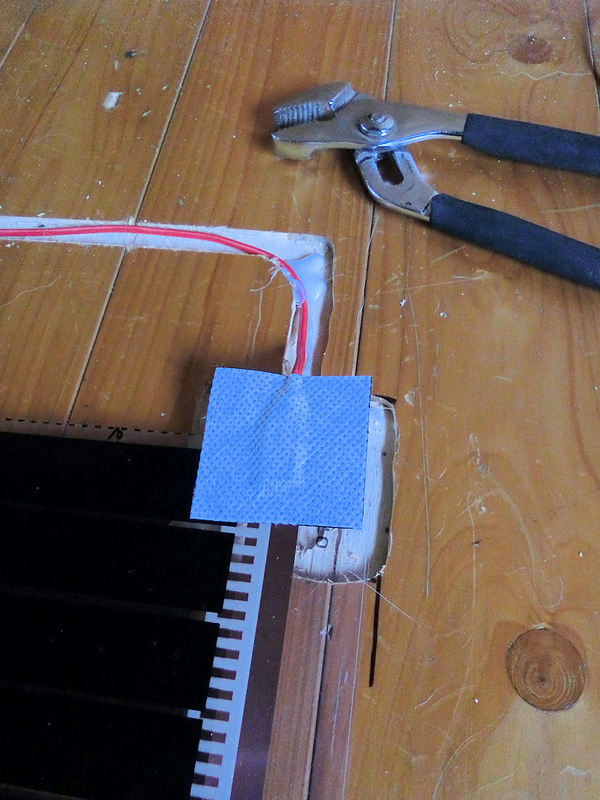
▲ 。。。そしてクリップの上にも張ります。これでこぼれた水から守れます。
One piece of tape underneath, and another on top, and it's time to connect the controller to the mains power, and test the system.
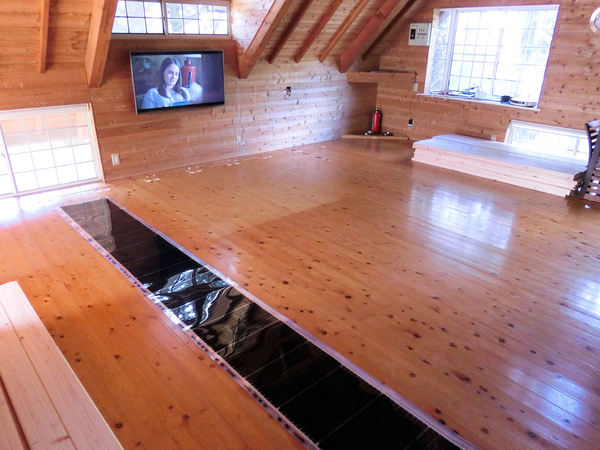
▲ ヒーティングフィルムの一枚目です。
This was the first 50cm-wide strip of heating film.
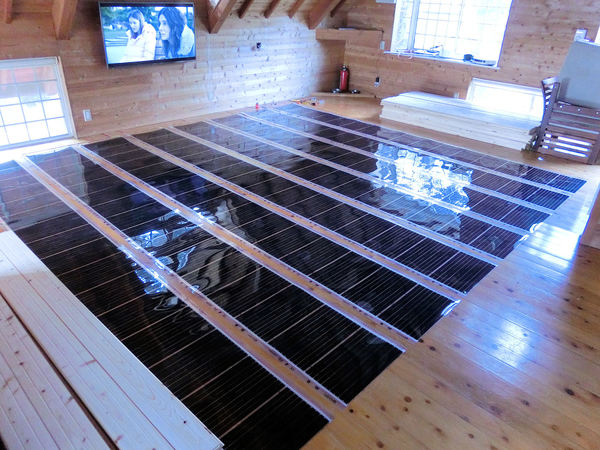
▲ 長さ4mの幅50cmフィルムを8枚で合計16m²の床暖房となります。各1m²には220Wになりますので、16m²で合計3520Wになります。ただし、私がミスしちゃった!ワットがこれでOKですが、アンプも大事でした。合計3520ワットなら100Vのシステムには約35アンプが必要です。
ブレーカー1個が20Aまでになります!そしてコントローラーも1個16Aまでです!OH NO!!!私が知らなかったです!
ということがブレーカー2個とコントローラー2個に分けないといけないです。残念!壁の中にまだ電気配線の作業がまた必要でした!
In total I planned for eight 4m-long strips of heating film, giving a total of 16m² of heating film. Since the wattage for each 1m² is 220W, this would give a total of 3.5KW for 16m². That was within the 3.6KW limit for a single controller. However, I completely failed to pay proper attention to the AMPS! Oh no!
On a 100V Japanese system, 3.5KW would require 35Amps, and a single fuse in the fusebox is limited to 20Amps. What's more, I hadn't noticed that a single controller was limited to 16A. Bugger! I'm an idiot.
So I feel like a fool for not spotting the problem, but at least it wasn't too difficult to fix. I opened up the walls again, and added a second controller. Thus, the 35Amps that were too much for a single controller, could be neatly split between 2 controllers. Well, almost.....
* If you are lucky enough to be able to connect to a 200V fusebox instead of a standard Japanese 100V fusebox, it will only use half the Amps, which is handy. Google how to calculate amps for more info. But note that you will need to order 200V heating film, not 100V.
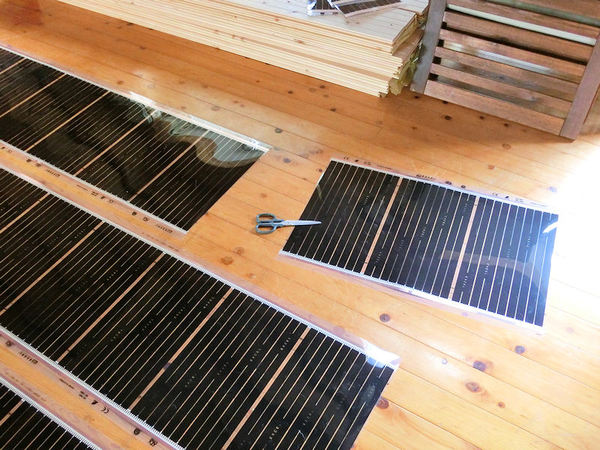
▲ 2個のコントローラーのリミットが32Aですので、フィルムもちょっと小さくしないとね!はさみで簡単に切ることができます。
ラッキー!
Since the limit for one controller was 16Amps, and I currently was trying for 35Amps-worth of system, I had to remove a couple of metres of film to bring the total down to 32A (16A on each controller). So in the end, I was using 14m² of film instead of 16m², and using 2 controllers to power it - which works fine! Yay!
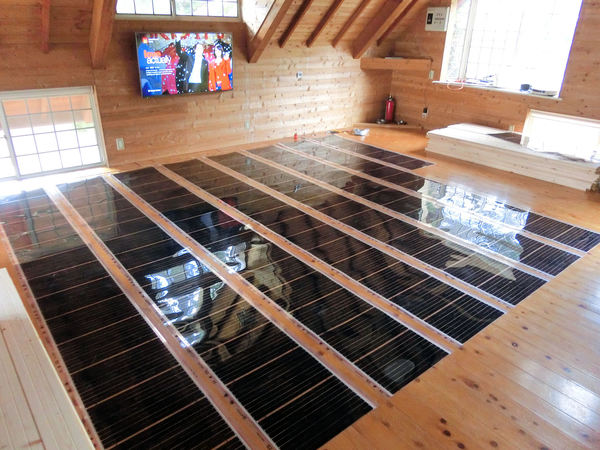
▲ 写真のように16m²のつもりから14m²に小さくしました。合計14m²の床暖房で約3100ワットになると、2個のコントローラー(と2個のブレーカー)に接続と各コントローラーが15.5Aになります。これでOKでした!フローリングを張る前に気が付いてよかった!
I'm just glad that I tested the system at every stage of the build. Nothing blew up or caught fire, it just kept tripping the fusebox, and eventually I was able to work out the reason! So, now you know - you should aim for about 14m² for a single controller, and you'll have a lovely efficient heating system!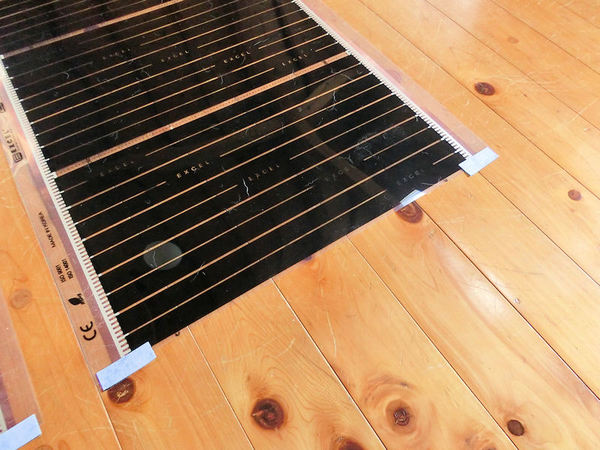
▲ 最後の作業ですが、各フィルムの反対側(配線接続ではない側)にまた防水テープを張らないといけないです。これで完成です!
Once you've tested your system works and cut any extra film off, you need to finish up the job by adding a bit of waterproof tape to the ends of each section, to close those copper strips off from moisture. And that's it!
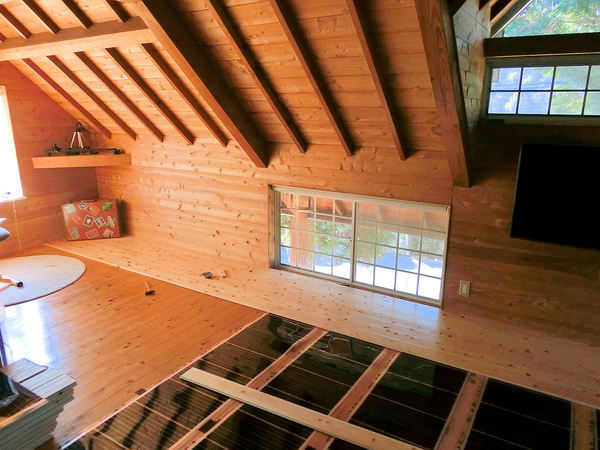
▲ 次の日から無垢フローリングを始めました。
I started covering the new underfloor heating system with some shiny new flooring the next day....
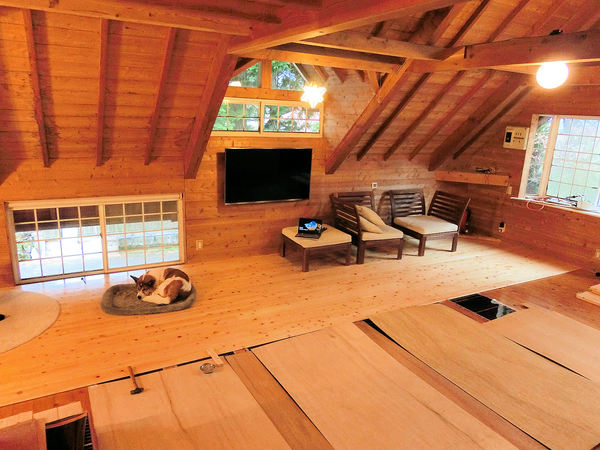
▲ 無垢フローリングの作業を次回から紹介します。お楽しみにしてください!
... but I'll save that for a new blog on another day!
| << Floating shelves 棚作り 2022-01-11 | E-bike conversion DIYで電動自転車を作った! >> 2022-03-08 |
〒869-2226 熊本県阿蘇市乙姫2070-48
営業時間:13:00~17:00*
営業日:毎週金曜日・土曜日
(* ドアが閉まっている場合もあります ー 近くにいます。ちょっとお待ち下さい!)


Painted models available 塗装済の模型発売中!
Making garage doors ガレージの扉DIY作成
New side-project... a hobbit house! ホビットの家
Shops added to the shop ショップにお店
Repainting a (mini) car ミニカーのリペイント
Buying land in Otohime 乙姫で土地探し
Scale model of the Inaba Residence 稲葉家下屋敷の模型